Mum's Classic Scones
There's nothing quite like the warm, buttery goodness of a freshly baked scone. Whether you enjoy them with clotted cream and jam for a traditional cream tea or simply on their own with a cup of tea, scones are a quintessentially British treat that is loved around the world. In this blog post, I will reveal the authentic British scone recipe that will have you baking like a pro in no time.
Delving into the essence of what constitutes a British scone is crucial for anyone aiming to master this beloved baked good. The British scone distinguishes itself through its texture and flavour profile. Traditionally, it is less sweet than its American counterpart, which often incorporates fruits, nuts, or chocolate. The British version focuses on achieving a perfect, flaky texture that crumbles delightfully with each bite. This is accomplished through the careful balance of ingredients and technique, ensuring that the scone remains light and airy.
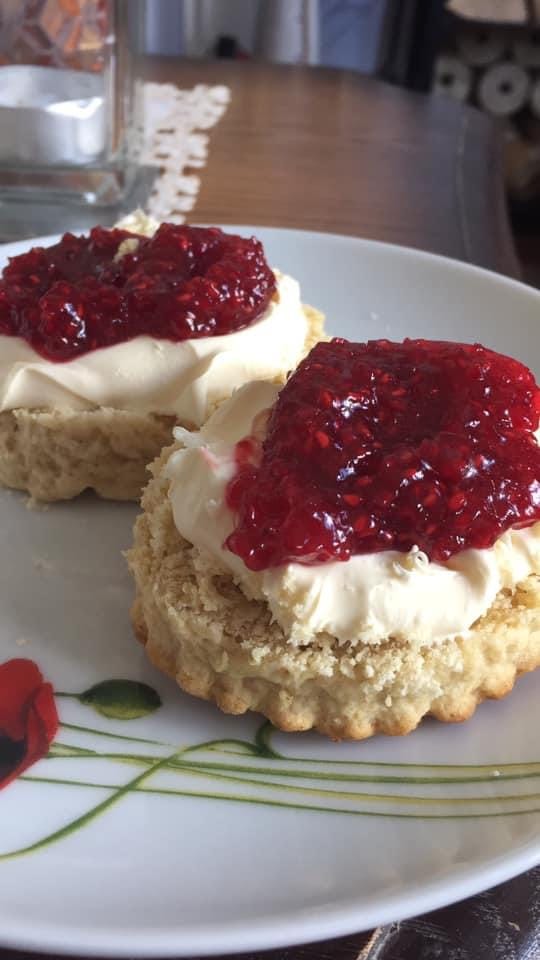
A hallmark of the British scone is its versatility in serving options. Whilst in some cultures scones may lean towards sweeter or savoury additions, the British scone maintains a subtle sweetness, making it the perfect canvas for a variety of toppings. The most iconic way to enjoy them is with a generous dollop of clotted cream and a spoonful of jam, a combination that elevates the simple scone into a quintessential British indulgence. However, the scone's simplicity also means it can be enjoyed in its purest form, perhaps accompanied by a spread of butter that melts into its warm, tender crumb.
Understanding the distinctive characteristics of British scones—namely, their subtle sweetness, flaky texture, and role as a vessel for delectable toppings—is key for any baker aspiring to recreate this classic treat. With this foundation, we can appreciate the artistry behind crafting the perfect scone and ensure that each batch brings a taste of British tradition into our homes.
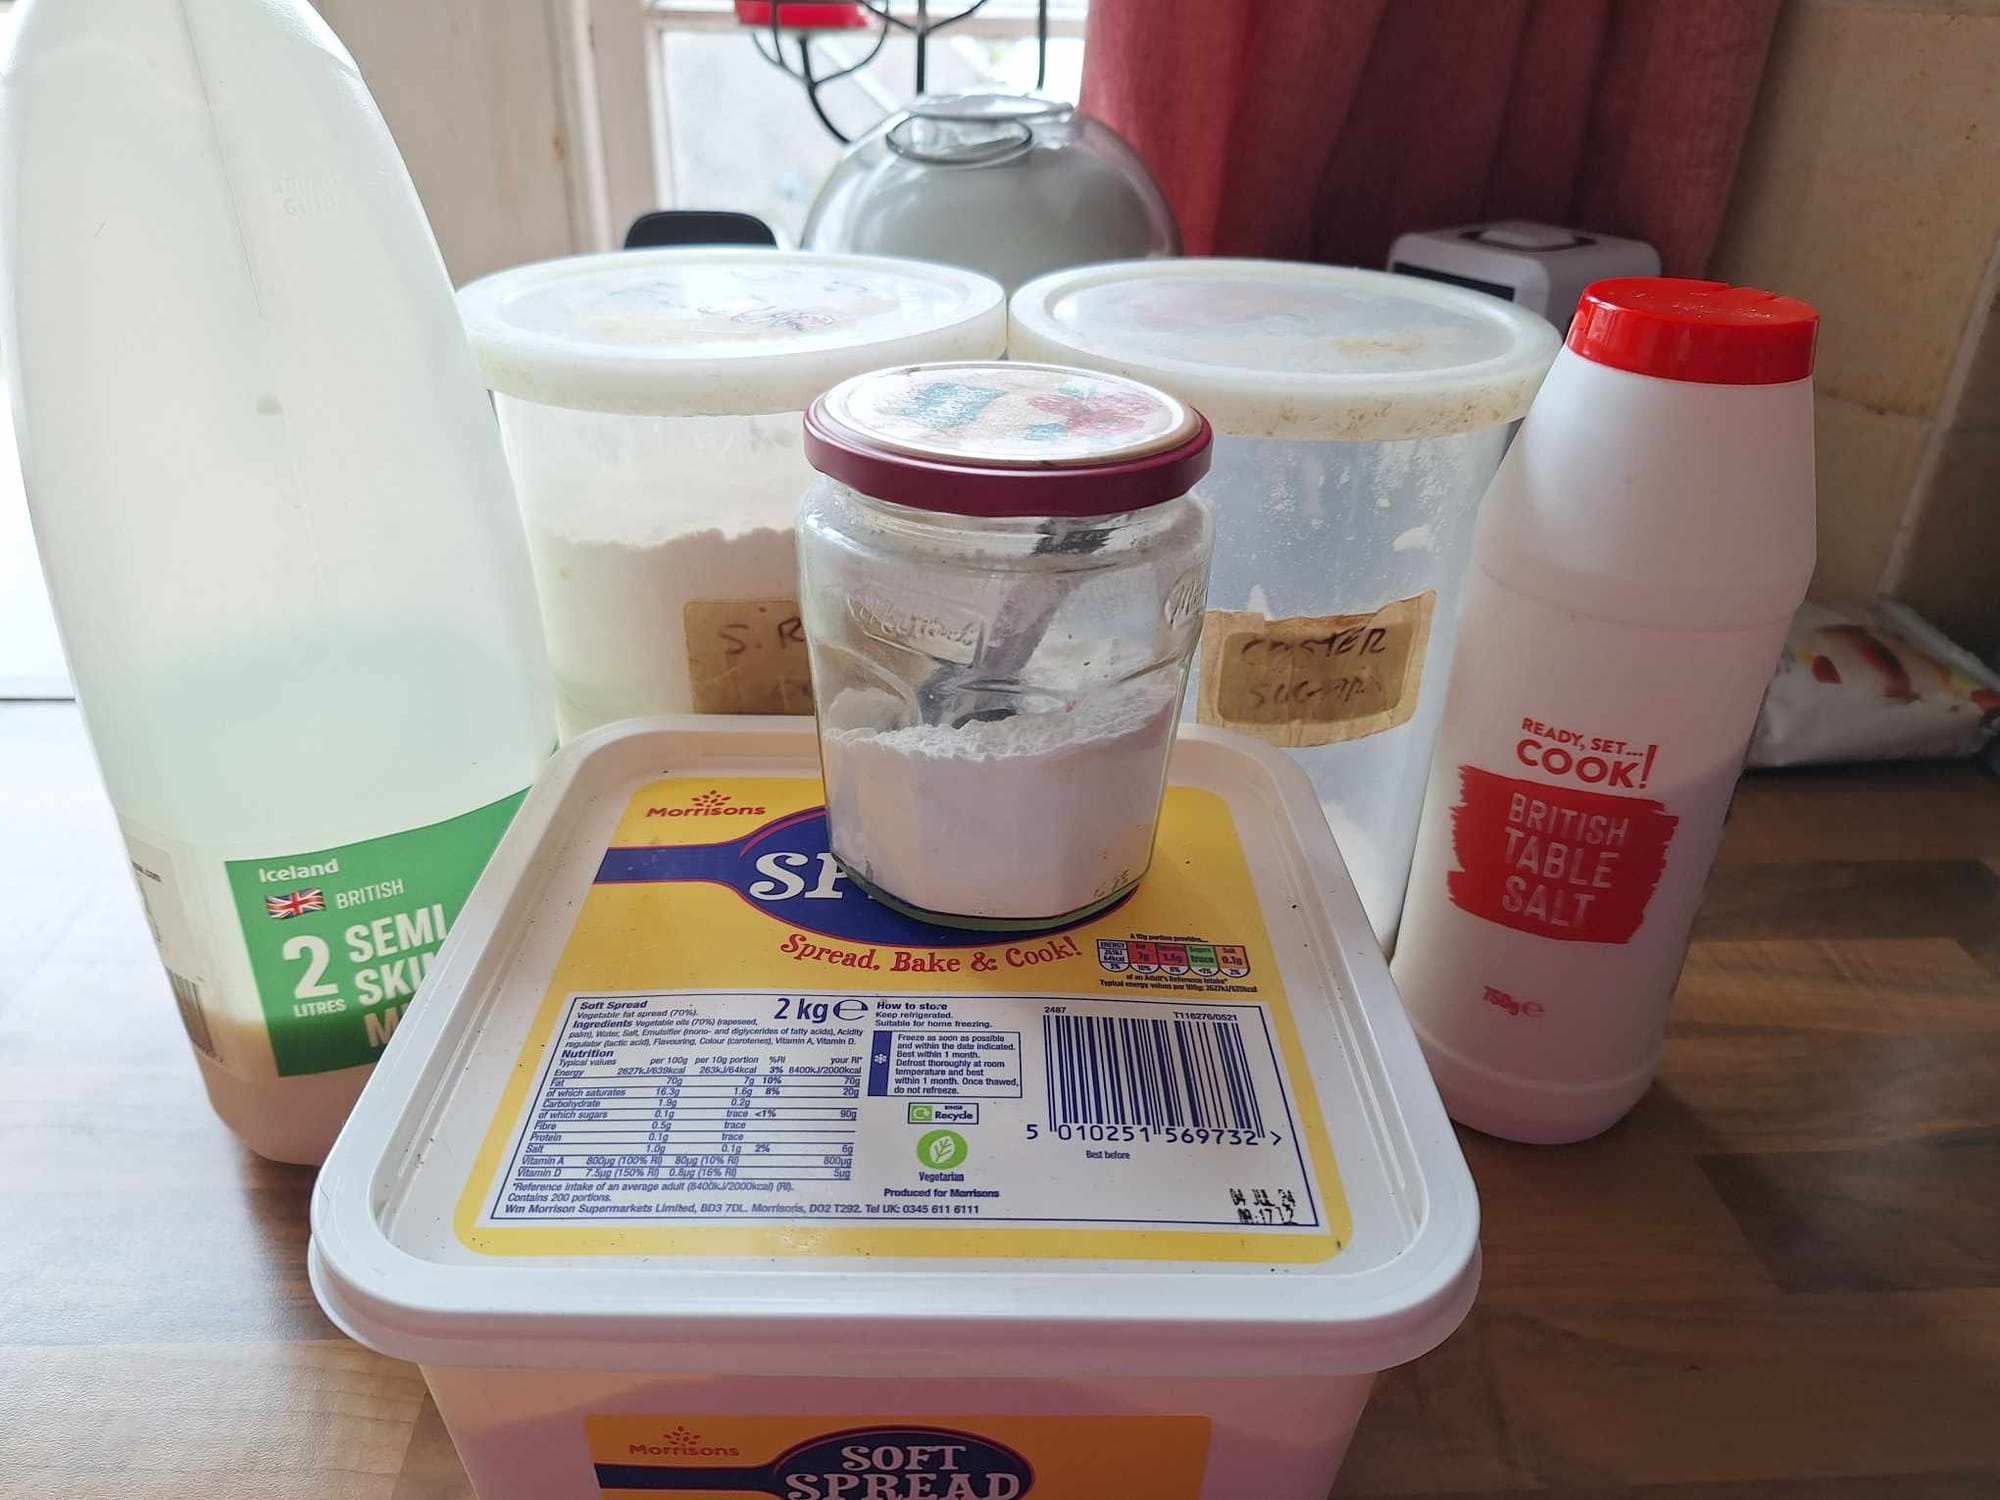
To embark on your journey of crafting authentic British scones, assembling the right ingredients is a critical step. Your pantry should include:

Ingredients
- 350g of self-raising flour, a staple for achieving that quintessential light and airy texture.
- 85g of butter or margarine, preferably cold and cut into small cubes, to ensure the dough achieves the perfect crumble.
- 3 tablespoons of caster sugar will lend the scones their characteristic subtle sweetness.
- 175ml of milk will bring the dough together, adding to the tender crumb of the final bake.
- 1 teaspoon of baking powder will aid in the scone's rise, ensuring they are delightfully fluffy.
- A pinch of salt is the final touch, balancing the flavours and enhancing the overall taste of the scones.
These ingredients, though simple, are the cornerstone of authentic British scones. Their careful combination, respecting proportions and quality, is what sets apart a truly exceptional scone from an ordinary one. As you gather these ingredients, consider the role each plays in the texture and flavour profile of the scone, underscoring the importance of precision and quality in baking. With these components at the ready, you’re well on your way to baking scones that encapsulate the charm and tradition of British baking.

Crafting the perfect scone dough is an art that requires a gentle touch and keen attention to detail.
Method
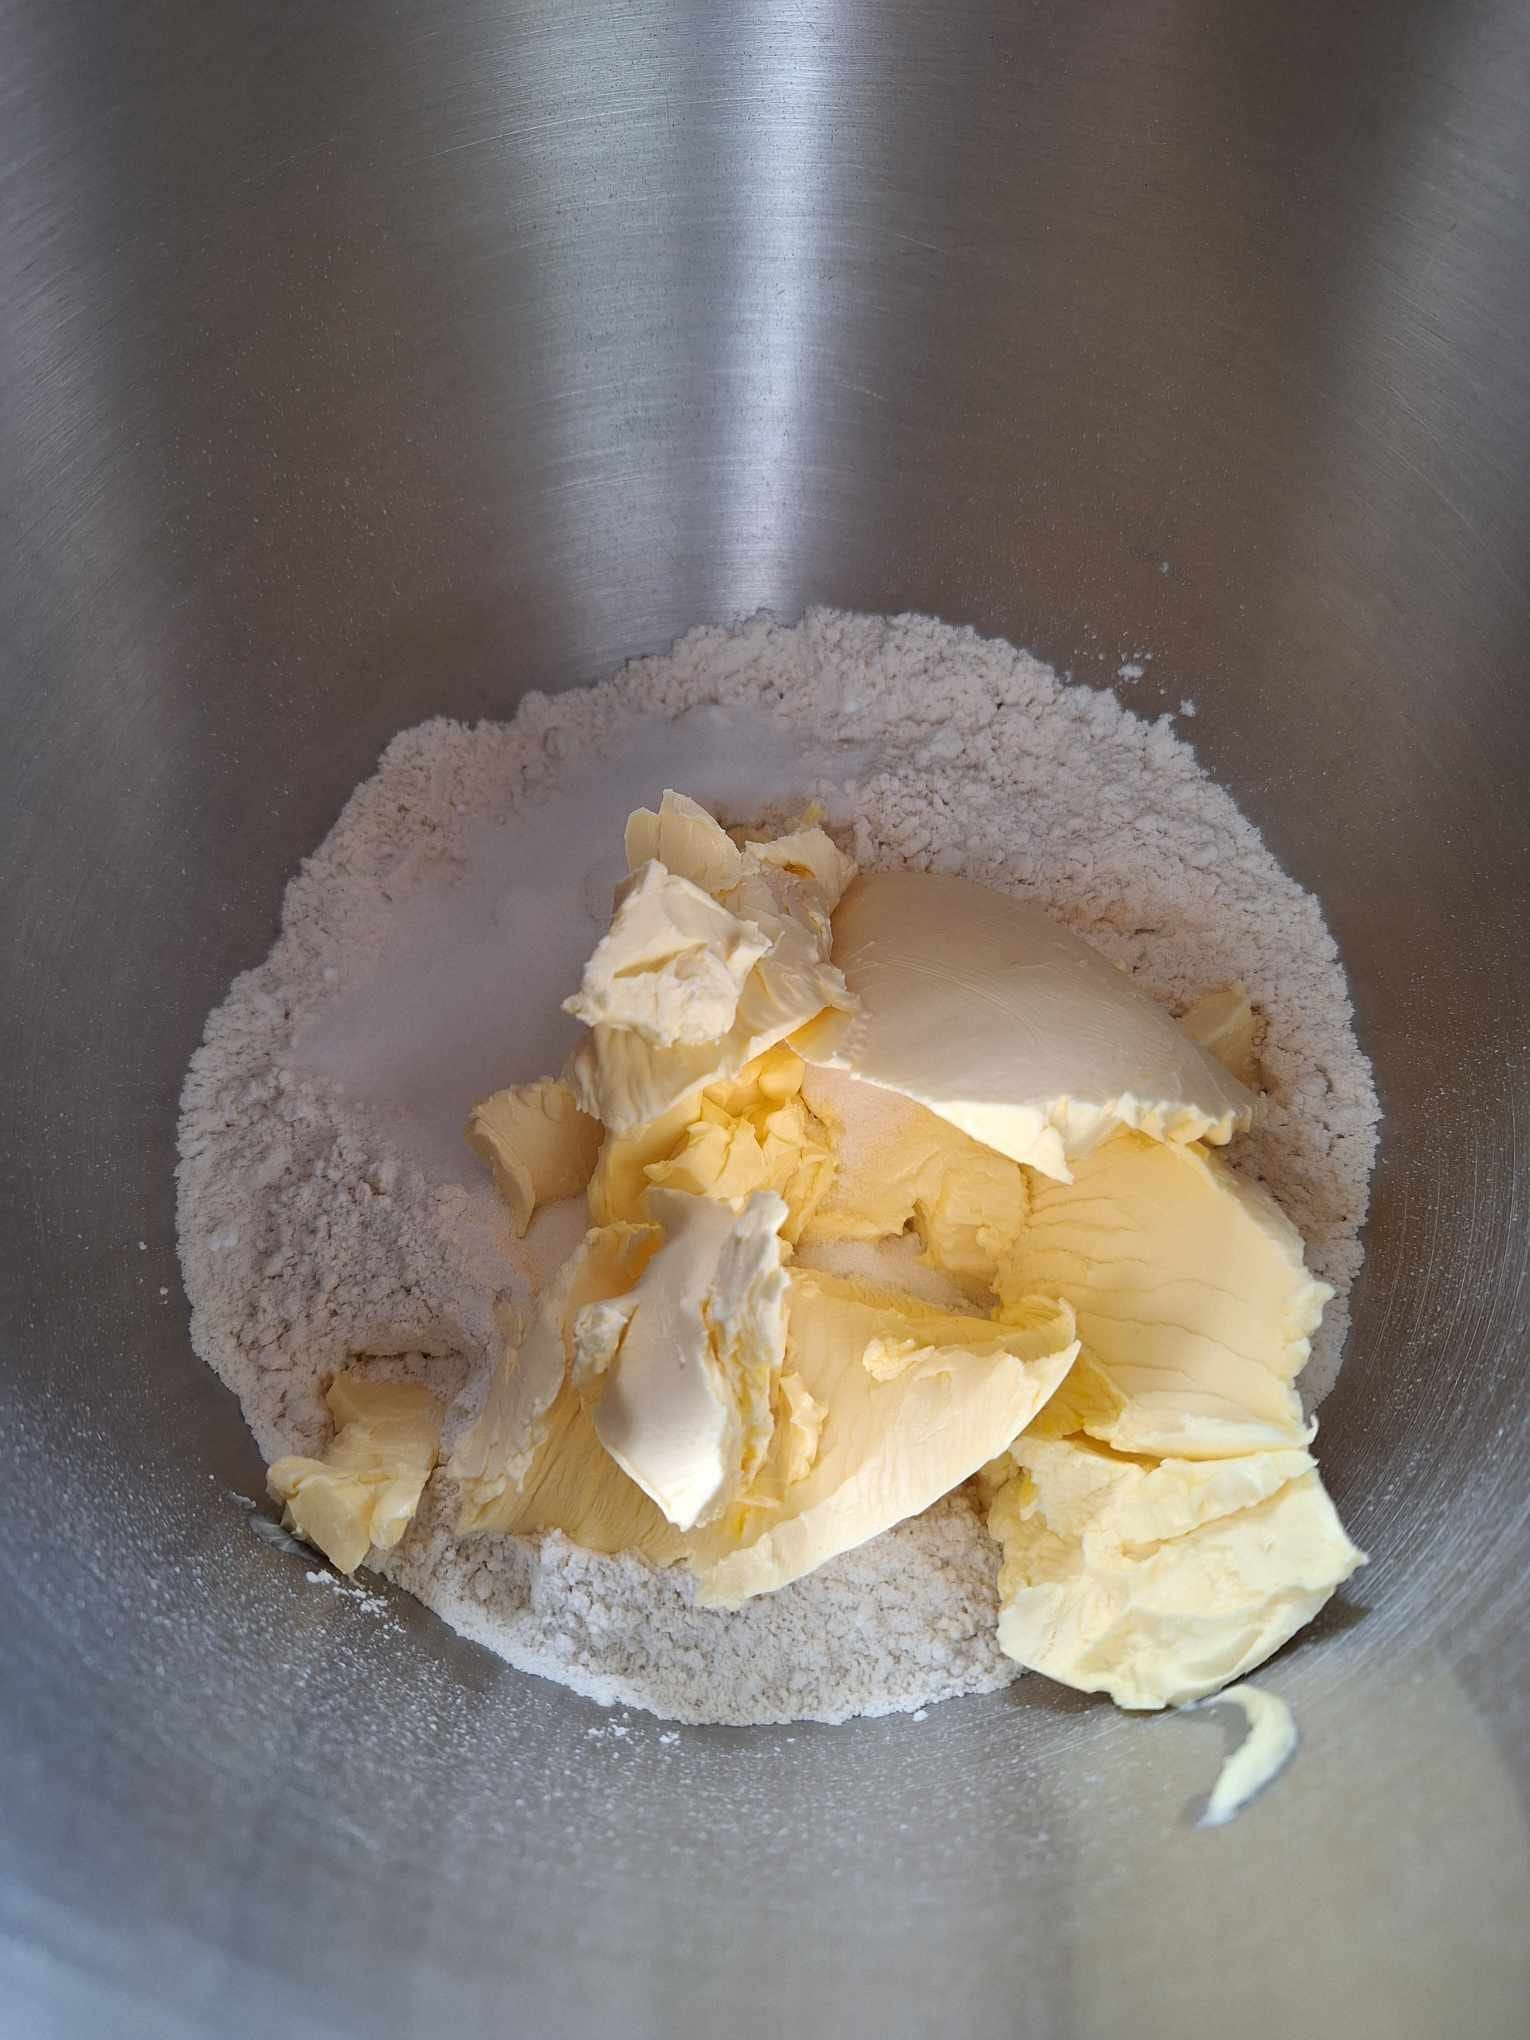
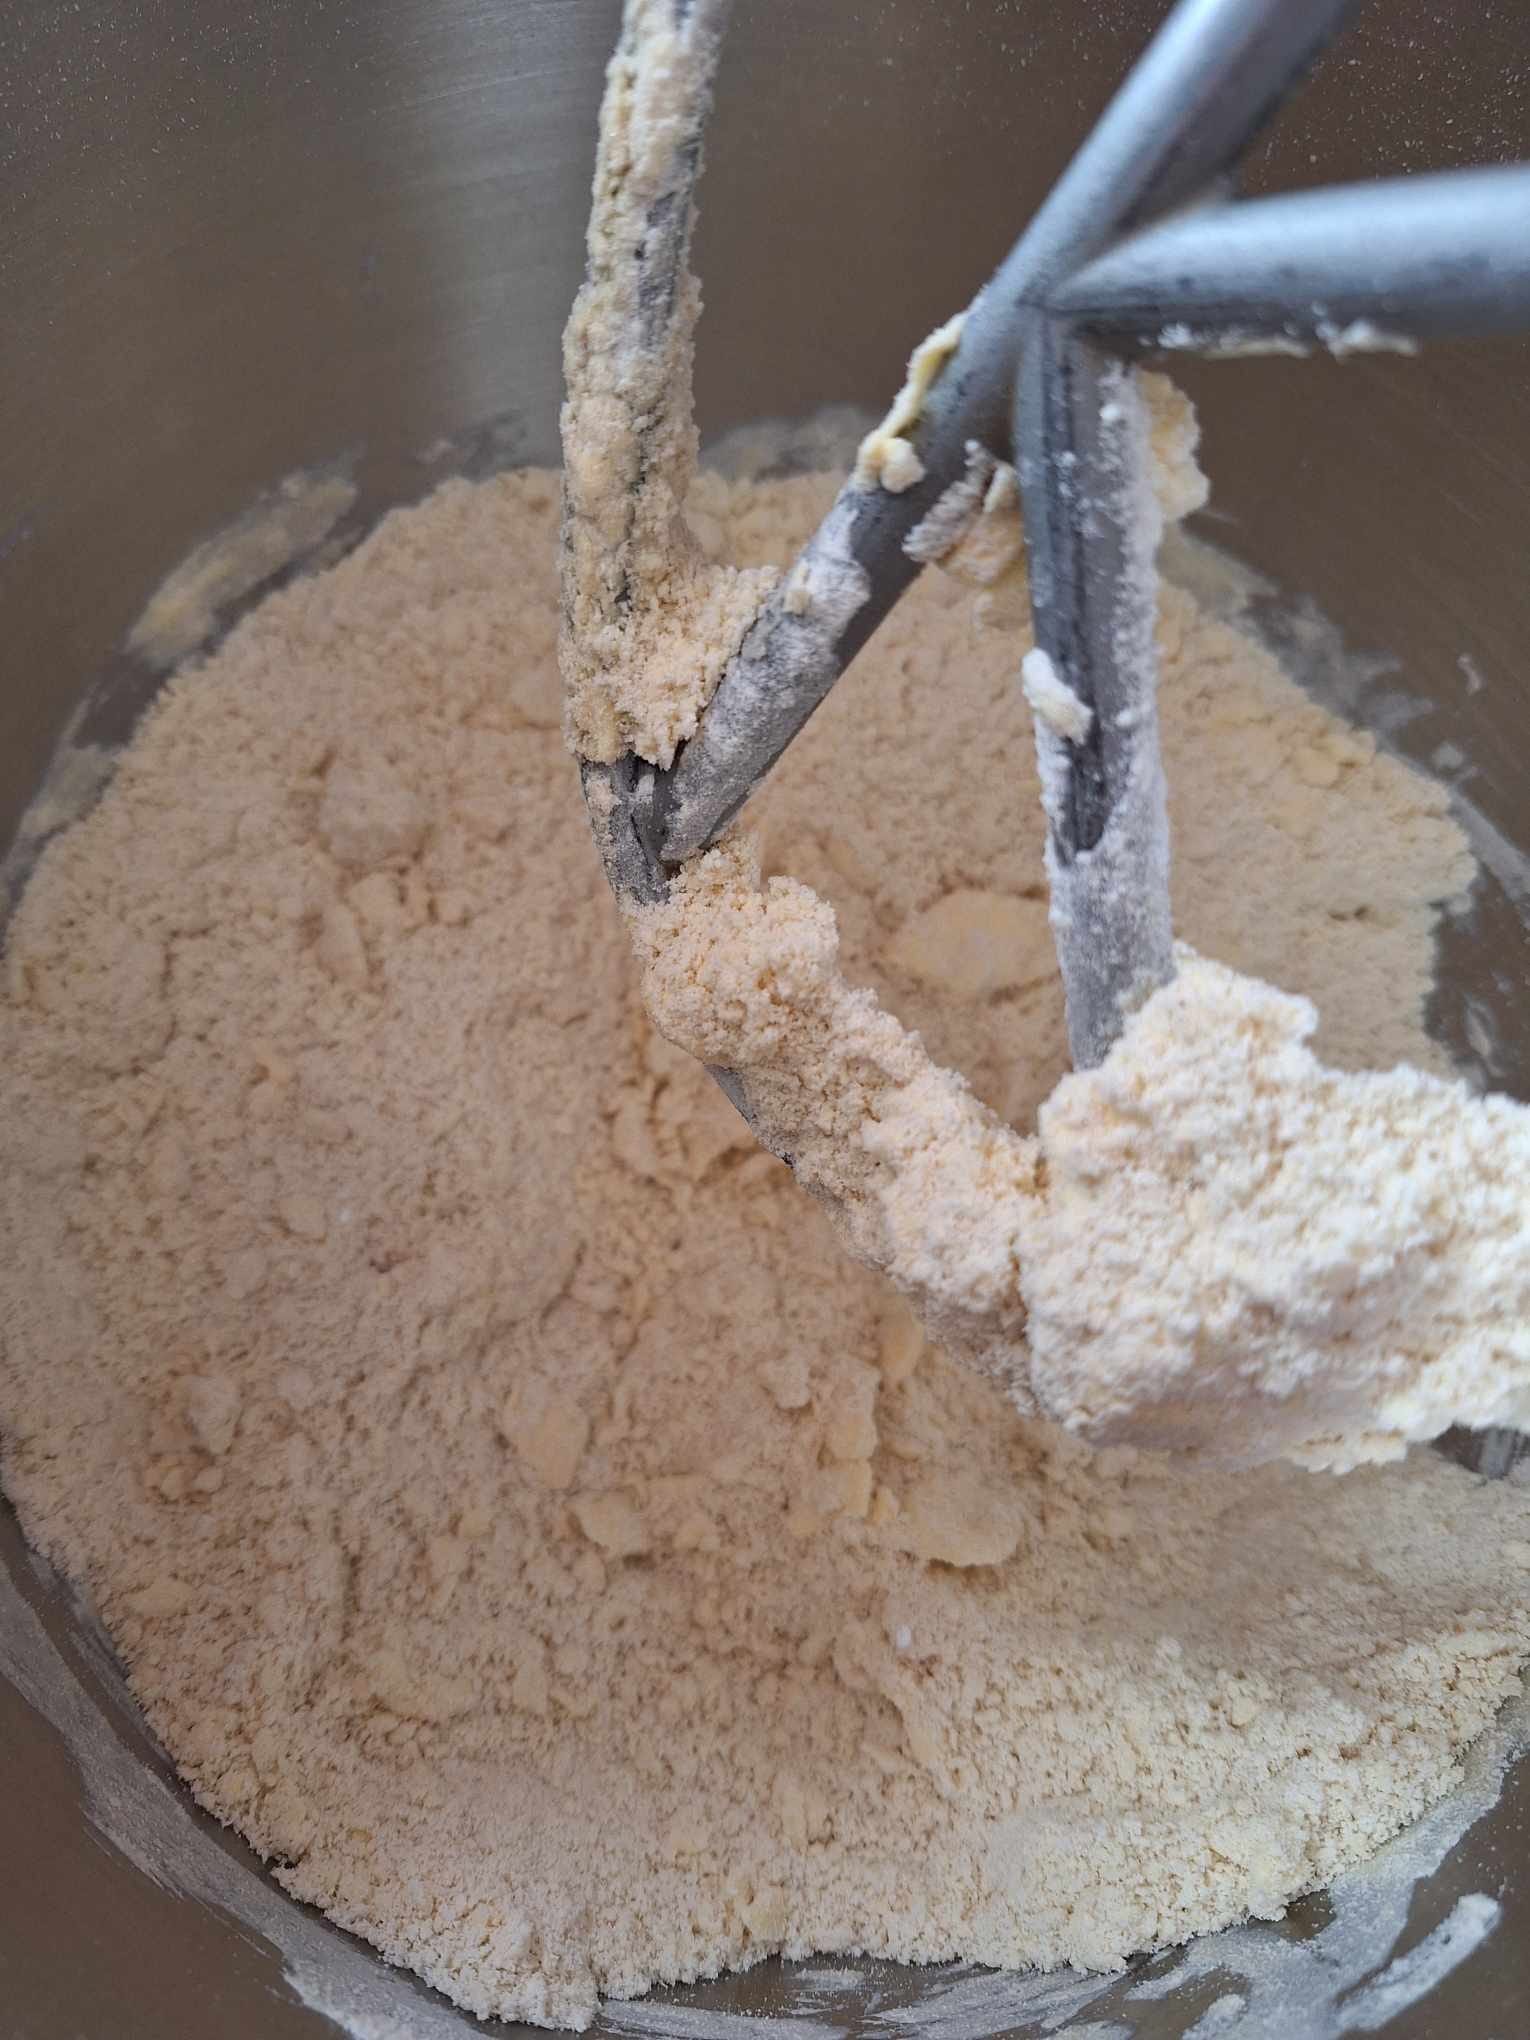
- Begin by combining the cold, cubed butter with the self-raising flour. This process, known as rubbing in, should be performed with care, ensuring the mixture achieves a breadcrumb-like consistency. This technique is crucial for creating the flaky texture that British scones are celebrated for.
- Next, incorporate the caster sugar, baking powder, and a pinch of salt into the flour and butter mixture. These ingredients not only contribute to the flavour and rise of the scones but also to their golden colour.
- The secret to a moist, tender crumb lies in the gradual addition of milk. Pour in the milk slowly, mixing just until the dough comes together into a soft, pliable mass. It's imperative at this stage to resist the urge to overwork the dough. Overmixing can activate the gluten in the flour, leading to a dense, chewy texture rather than the light, airy scones we aspire to.
The goal is to handle the dough as little as possible, maintaining a light touch throughout. Once mixed, the dough should be turned out onto a lightly floured surface, ready for the next step. Achieving the perfect scone dough is less about the ingredients themselves and more about the method and mindfulness applied during the process. By adhering to these tips and techniques, you're well on your way to mastering the art of scone making, bringing a piece of British baking excellence into your kitchen.
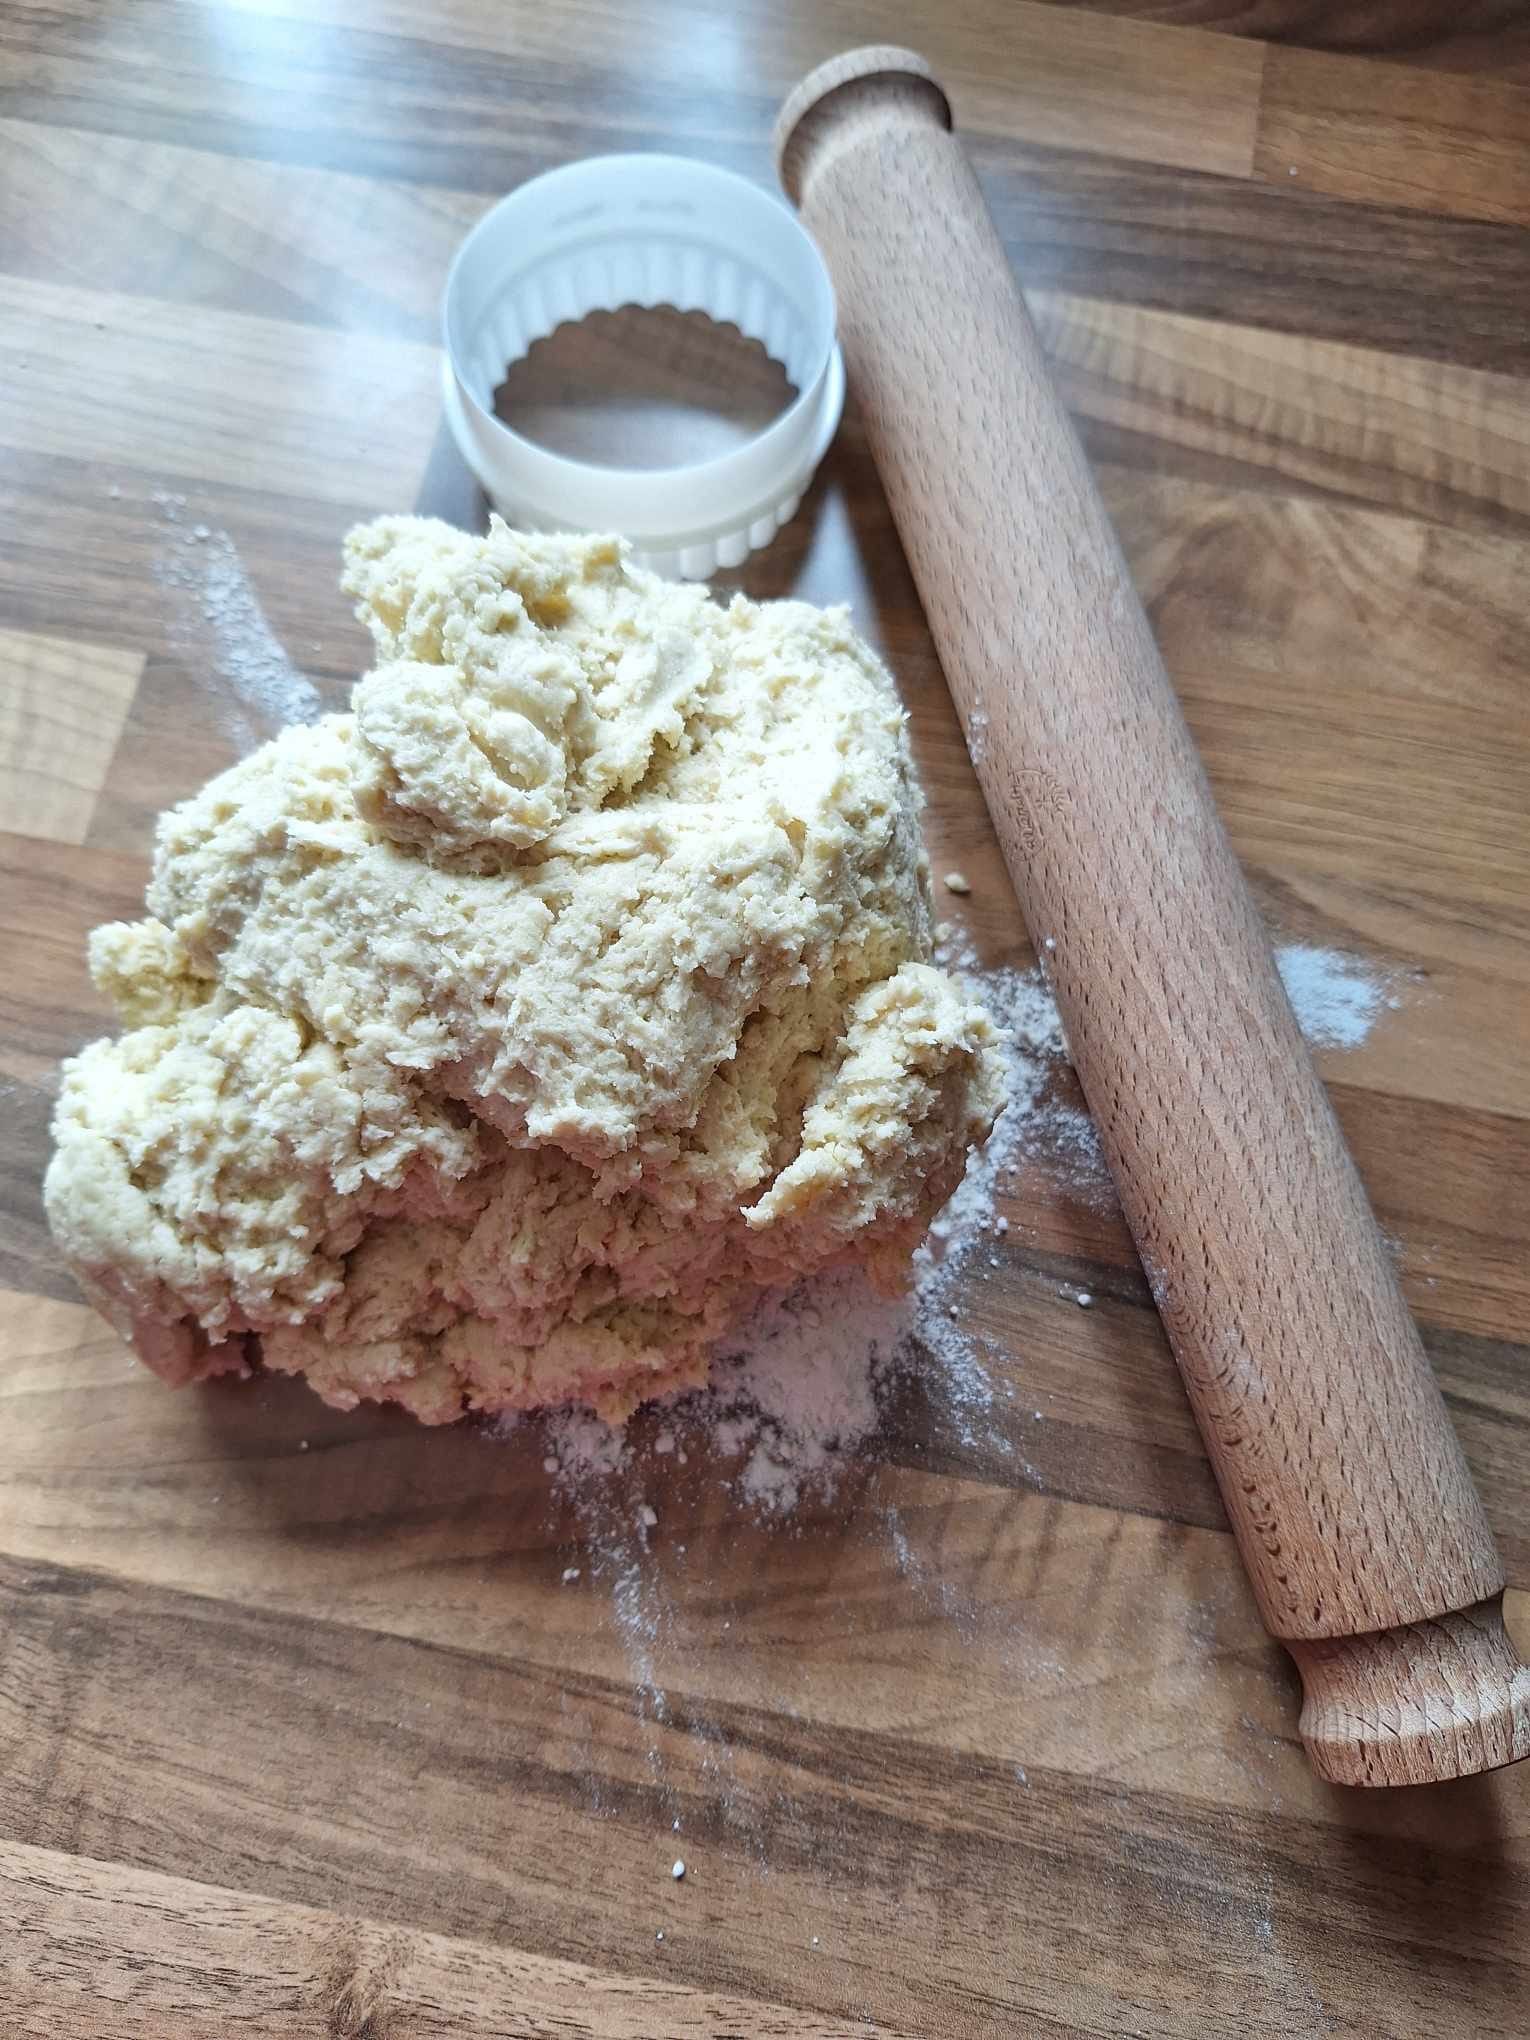
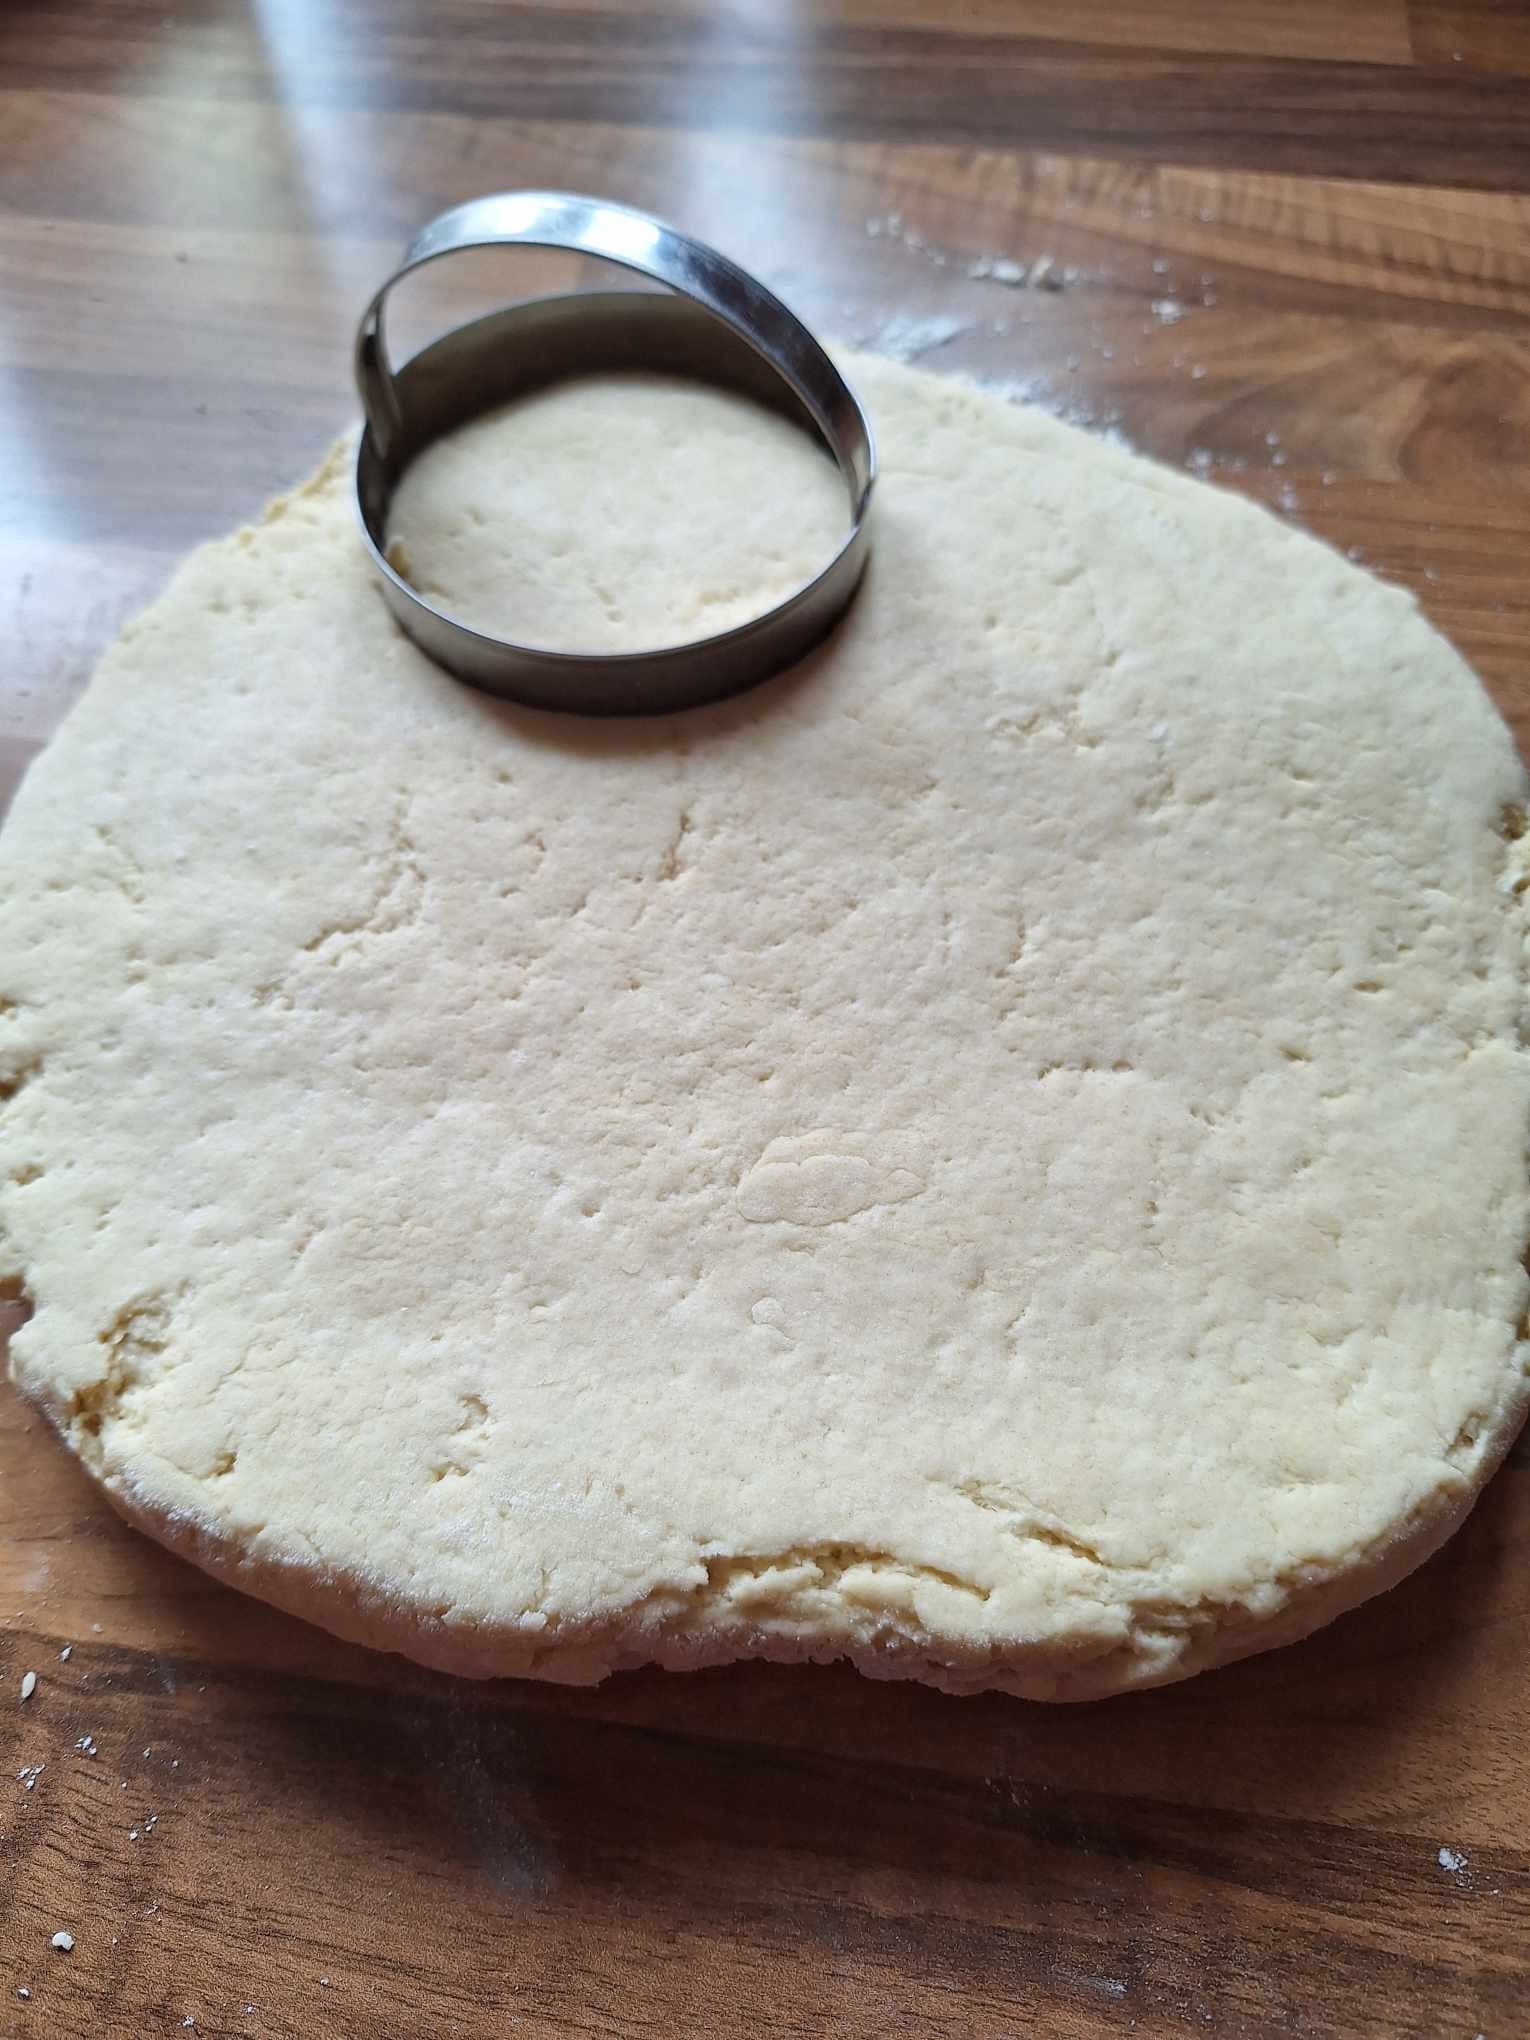
- With your scone dough now ready to transform into the perfect teatime treat, the next step is to give it form. Lightly flour your work surface to prevent the dough from sticking. Then, with a tender touch, tip the dough out and gently flatten it into a round shape. Aim for a thickness of about 2cm – this is ideal for ensuring that your scones have enough body to rise beautifully, yet remain delicate when bitten into.
- For cutting, select a sharp, round cutter - the diameter can vary depending on your preference for scone size, but a 5cm cutter is a good standard. Press the cutter straight down into the dough and lift it out without twisting. Twisting the cutter seals the edges, which can impede the scone's majestic rise in the oven. If the dough sticks to the cutter, dipping it in flour between cuts can help.

- After cutting, carefully transfer the scones to a baking tray that has been prepared with greaseproof paper. Arrange them so that they have a bit of space to expand, but not so much that they lose the comforting warmth from their neighbours during the bake. If you find yourself with excess dough after cutting, simply bring it together gently and repeat the flattening and cutting process until all the dough is used. This step is about precision and care, setting the stage for your scones to achieve their full, glorious potential in the oven. Remember, the love and attention you give to shaping and cutting your scones will be evident in every delightful bite.
- Preheat your oven to 220°C (fan 200°C, gas mark 7) before you begin shaping your scones, ensuring it reaches the correct temperature for welcoming your dough. This high heat is crucial for achieving the signature rise and golden colour of the scones. Place your prepared scones on the baking tray, ensuring they are spaced well. Brush the tops of the scones lightly with a bit of beaten egg or milk; this will give them a beautiful, glossy finish as they bake. Slide the tray into the preheated oven and bake for approximately 12-15 minutes or until the scones are well risen and exhibit a golden-brown hue.
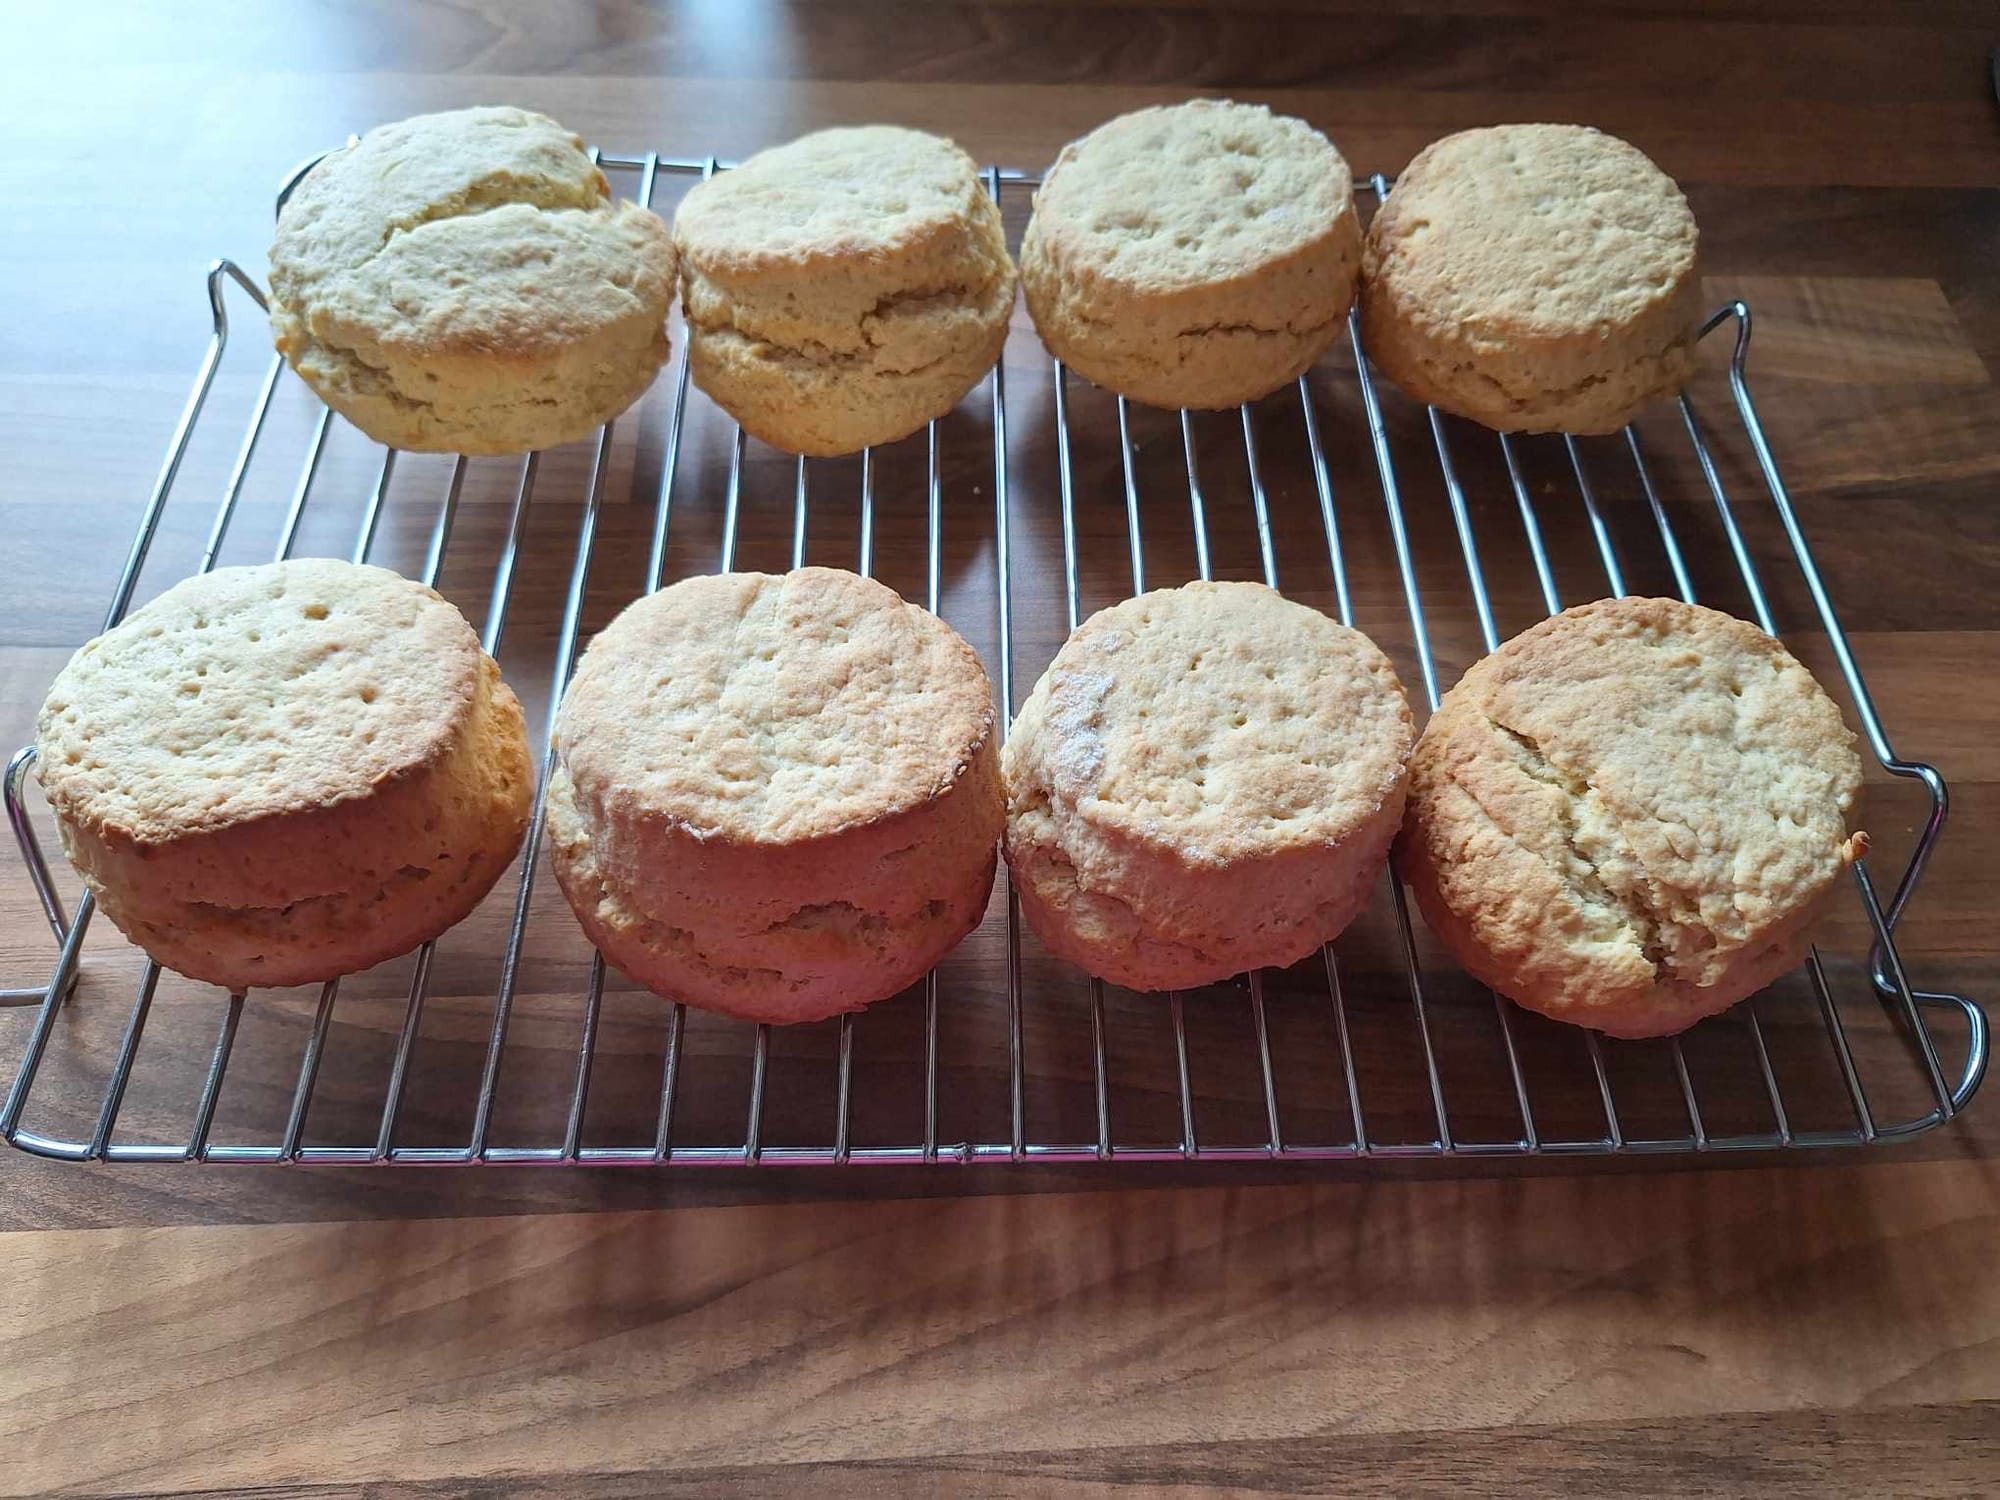
The scones will expand and rise rapidly in the first few minutes, so it's advisable not to open the oven door during this crucial time. Watching through the oven window, if available, allows you to monitor their progress without disrupting the baking process.
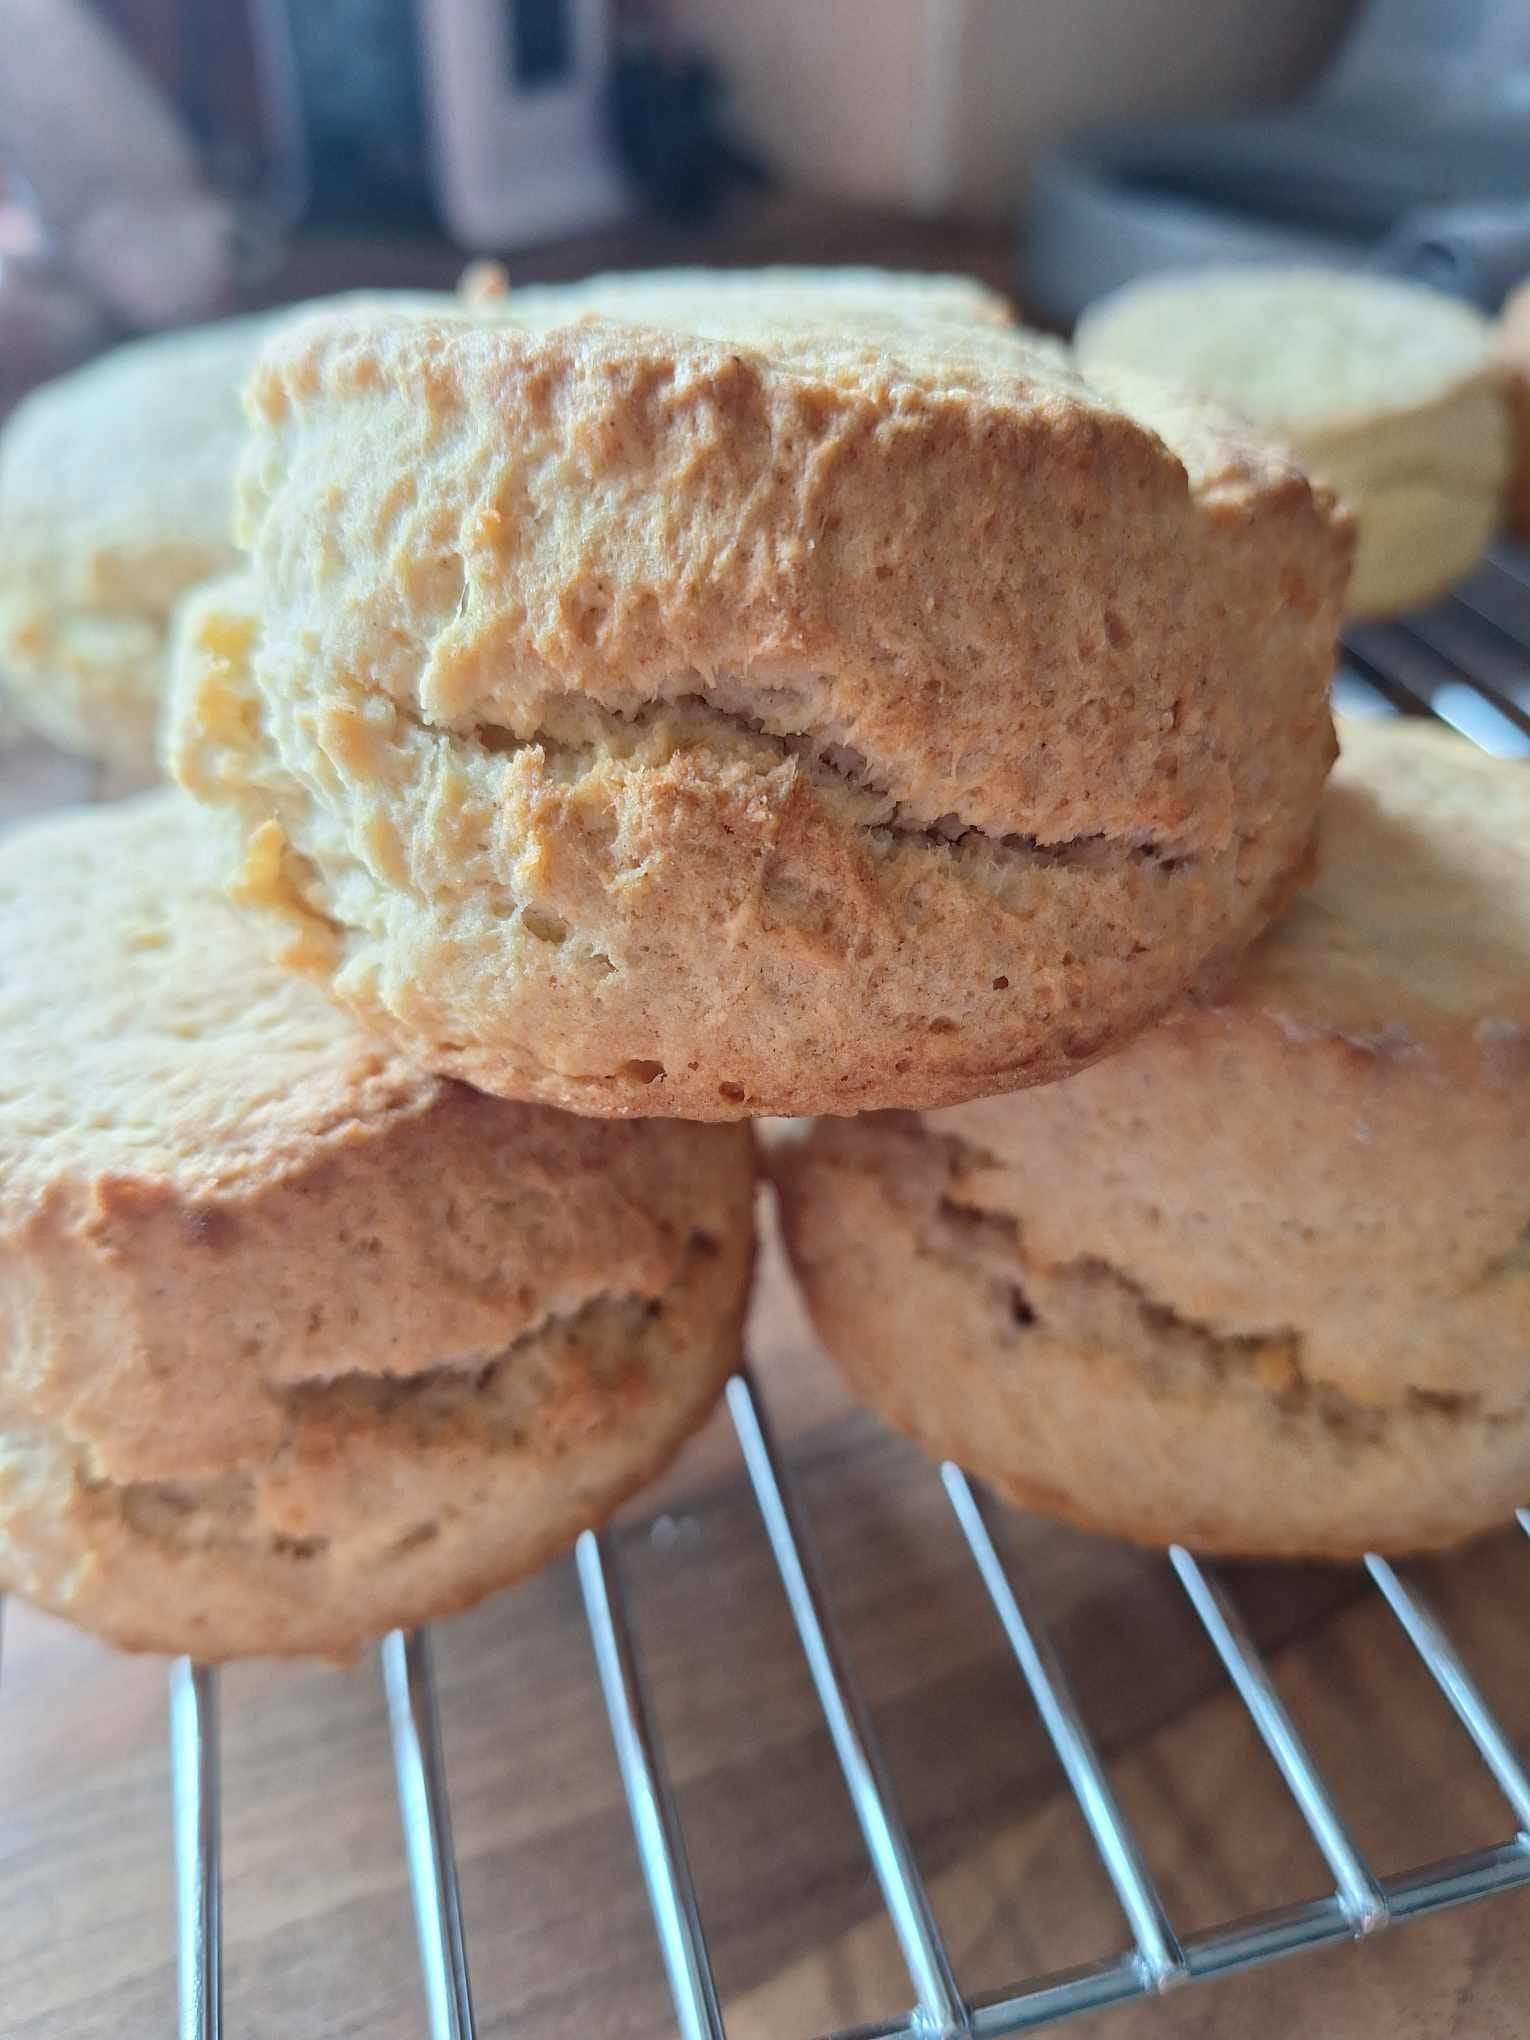
- Once baked to perfection, remove the scones from the oven and transfer them to a wire rack to cool slightly. This resting period allows the scones to firm up just enough to handle, yet ensures they remain tender and warm for serving. This step is pivotal for achieving scones that are not only visually appealing but also texturally satisfying, with a crisp exterior giving way to a soft, fluffy interior.
Once your scones have cooled slightly, they're ready to be adorned with their classic companions: clotted cream and jam. The order of these toppings is a topic of much debate, with some preferring to spread the cream first, followed by a dollop of jam, while others swear by the reverse. Regardless of your preference, this pairing is a match made in heaven, elevating the simple scone to a sublime treat.

For those seeking a twist on tradition, scones offer a versatile base for a variety of flavours. Consider a slather of butter that melts into their warm crumb, or perhaps a drizzle of honey for a sweet, sticky contrast. A sprinkle of sugar just before baking can also add a delightful crunch and sparkle to the crust.
Accompany your scones with a freshly brewed pot of tea, selecting a blend that complements the richness of the cream and the sweetness of the jam. Whether it’s a robust Assam or a delicate Darjeeling, the ritual of tea pairs beautifully with the indulgence of scones, creating a moment of pure pleasure.
In embracing these serving suggestions, you invite not only a taste of British culinary tradition into your home but also an opportunity to create cherished memories over a shared love for this cherished baked good.
If you make this dish, why not send me a picture on Instagram using the #acountrygirlskitchen so I can go over and show it some love.
I hope you all have a wonderful day.
*Chefs Kiss*